Thursday 29 December 2011

The Overland Track, Tasmania


Christmas is not my only excuse for not posting recently, we have been away hiking the Overland Track in Tassie.  6 nights and 7 days of hiking the Cradle Mountain to Lake St Clair region, camping in gorgeous locations each evening and wondering at incredible and ever changing scenery each day.  Plenty of wildlife - wombats, pademelons, wallabies, echidna, a HUGE possum attempting to enter our tent and not just one but about 6 platypus!


Amazing weather (aside from rain on the last night, which we paid for by having set up camp in what turned out to be a very large puddle by morning).  Yummy home made gourmet dehydrated dinners and our favourite end-of-day snack: popcorn with plenty of salt cooked on the trangia.


The only downside to the whole trip was getting back to Perth to have the awful pain I had been experiencing in my feet on the last day of walking being diagnosed as stress fractures of my heel bones.  At least I've felt justified in how much I'd been hobbling since finishing the hike, not even able to limp given it is both heels!  'Keep off your feet as much as possible' is what I am meant to be doing.  Ha!  Washing all the stinky hiking gear, hosting of Christmas gatherings, a 20 month old who is increasingly mobile and an ingrained need to always be doing something.  It hasn't been easy, but still worth it!


Tuesday 22 November 2011

'Toot Toot'

Another up-cycle project, this time with a couple of magnetic pull along wooden toy trains I picked up at a baby market.
Each train carriage has grooves that must have once held something that you could slip in and out, but this wasn't part of the purchase so I decided to make my own.  This was the result.  A perfect stocking filler for the Little Imp!


Part of this project was playing around with my sewing machine and some free motion embroidery.  I had a go using this to attach the felt letters to the fabric backgrounds and although I have a way to go until I am happy to embroider something a bit more special, I was surprised that it wasn't as hard to do as I expected.

Although I have made these little fabric letter cards to fit into the train carriages, they would also be great for kids for lots of other things - attach magnets for sticking on the fridge, adapt as a memory game or shape recognition with different felt symbols....

Basic 'How To' 

Cut out cardboard, background fabric and felt letters
  1. Measure and cut pieces of firm cardboard (e.g. from a box) to the size you want
  2. Measure and cut your background fabric  (here from blue & orange spotted patterns) - it needs to be double the length of the card with approx 1-2cm seam allowance all around 
  3. Cut out letters (or shapes/ symbols) from felt to fit the card
  4. Sew the felt letter onto the bottom half of the background fabric, positioning it to allow for bottom and side seams in the next step. This is where I played around with free motion embroidery, but you could  do this with a standard machine stitch or by hand)
  5. Fold each piece of background fabric in half, wrong sides together.  Using the cut cardboard pieces as a guide, mark the position for the side seams leaving a few extra millimeters on each side.  Then machine straight stitch up each side along these marks.  
  6. Trim side seams and turn right side out
  7. Slip cardboard piece into fabric pocket that you have created
  8. Slip stitch the bottom seam closed
Pieces from left to right demonstrating steps 4 - 8 


Saturday 5 November 2011

Fabric covered ideas book

 I'm a visual person.  I like making lists and planning things.  Sometimes I write these down, but more often than not I loose the scrap I've written on. This doesn't help with falling asleep at night, attempting to recall lists and plans somewhere from within my whirring brain.

On a recent op shop expedition for photo frames for Little Imp's room (I'll post about that project some time soon), I came across an unused notebook for 50c that I realised could do the trick.  A new cover to make it mine and I would have a place to jot and store my thoughts and ideas.

I'd had one of the Japanese-y pieces of fabric I bought a while back earmarked for a book cover of some description and a strip of thick linen from an upholstery swatch (also from an op shop) worked perfectly as a coordinating feature.   A very easy project indeed.

Here's how it turned out.

  
Basic 'How To'
  • Use a hard covered bound book for this project.  To work out how much fabric you need, open the book flat on the fabric and mark leaving an additional 5cm all the way around (to fold over and secure on the inside).  If the fabric has a design you want placed in a particular area on the cover take this into account (e.g. I wanted at least 2 full birds showing).
  • Cut the fabric to size using scissors or a quilting cutter.
  • Cut a coordinating/ contrasting strip to use as a feature on the front cover.  I used a teal upholstery linen that I frayed by pulling out a few threads along each long edge.
  • Work out where you want the coordinting strip placed and pin to secure it to the main fabric.
  • Machine stitch the strip to the main fabric using a small straight stitch in your choice of coloured thread along each edge.  I also used my machine to stitch 'OneLittleImp' along the strip for fun.
  • Then reposition the open book on the wrong side of the fabric.  Use PVA glue along the inside side edges of the front and back covers and stick the fabric down, pulling it taught across the book and spine as you do so.  Do not use glue on the outside of the covers as it will show through the fabric and ruin the finish.
  • Before you glue down the top and bottom edges snip the fabric on either side of the spine to allow the fabric to sit flat when you fold it over.  
  • Take care when folding over each of the corners to ensure you get a nice neat point. 
  • Use the flat blade of your scissors and a bit of extra glue to poke the thin pieces of fabric left at the top and bottom of the spine into the gap between the book cover and binding.
  • Measure and cut 2 pieces of card to stick over the fabric edges on the inside covers at the front and back of your book.
  • If you want to add some ribbons as page markers, cut these at approx 1.5 times the length of the book and secure them in place under the card on the front inside cover.


Friday 21 October 2011

Organising heaven


Wednesday 19 October 2011

A little table

I think I could class this as an up-cycle project of sorts.  I do love trawling through second hand sites like Gumtree, and now even more so as I have a real reason to be looking for quirky pieces of furniture that can add to the character of our home and the new extension.

 I need a bed side table that will fit in the small space left on my side of the bed as well as a small coffee table that will take my morning cup of coffee when I lie back and relax on our new sofa (when that arrives...and when I get time to relax!).  The little table I picked up the other week could actually work in either space, but it needed a little work first.

A few coats of laquer to the legs and the flaking chipboard base helped straight away.


It came with some plain white tiles in the top, a little boring for me.  These patterned orange ones are far more exciting, even a bit 'Moorish'(!), and I do like tiling and grouting.  So a little bit of tile cutting, liquid nails and grout and the job was done. Now just to decide where it will live...

Friday 14 October 2011

A long time between posts...

Time for hand craft has been limited lately.  Having an extension built, doing some renovating ourselves and working almost full time in the last few months doesn't leave much time for anything else.  But we are almost there.  Weeks of reheated dinners eaten on our laps in our bedroom, the only real safe haven from the dust are behind us and it is has definitely all been worth it.  Not only do we have a larger, light filled living area, but I now have a room just for all my craftiness!  I'll share that another time, but going back a few months now before the renovating began in earnest and we still had a couch to sit on I made my brother's little one a felt gift.

The inspiration for this came from two sources. One - my brother who is an amazing artist and drew a tree titled 'Grow' while waiting for his baby to arrive, and two - a book of Softies a hootchie gave me that had a tree softie (as well as a poo softie!).  This is my version for my little niece.


The Basic Gist

2 bits of orange felt for the tree top, with cut out felt circles/swirls, bird and heart hand sewn on with embroidery floss (given felt doesn't have a 'wrong' and 'right' side, beware the rookie mistake of sewing these embellishments onto both 'front' sides of the tree - doesn't work when you go to sew the pieces together!! A few 'bugger, bugger bugger's may have been muttered). Once you have added the swirls etc, machine sew the tree tops wrong sides together with blanket stitch, leaving a gap for squishing in some stuffing.

Cut out the felt tree trunk with the base of the trunk on the fold. Hand embroider a face on one side. Fold right sides together and stitch each side seam. Turn right side out and stuff.Insert the trunk into the tree top, adding a bit more stuffing if you need to and then complete the blanket stitches by hand to attach the tree top to trunk.


Wednesday 10 August 2011

My take on the traditional 'pillowcase' dress

After the first disaster of a tad-too-tight pillowcase dress design I decided to go it alone & make my own.  This is what I came up with, with a little help from Ergonomics-bollocks Hootchie.


Tutorial
First cut out a template pattern for the 3 pieces you need – a rectangle for the dress bottom & dress bodice and a facing piece for the arm holes.  To cut the arm hole I measured 3 inches across & down from one corner & drew a rough arc joining these points.
Bodice - 7.5x9 inches Bottom- 9.5x9 inches & facing

The facing pattern piece is made using the dress bodice arm cut out as a guide.

Then cut 2 each of the bottom & bodice pieces for the dress front & back in coordinating fabrics.


Cut 2 pieces of the facing in the same fabric as the bodice piece, placing one edge of the facing template on the fabric fold.

Pin front bottom & bodice fabrics together right sides facing & straight stitch along edge. Finish seam using a zigzag stitch or cut with pinking shears.  Repeat to make the back of the dress.  Pin front & back pieces of dress together, right sides facing & stitch together at sides, taking care to match up points at the side of the dress where the different fabrics meet.


Now, all of the other instructions I found for making this type of dress spoke of using bias binding to add support to the arm holes.  I don't have bias binding & didn't want to go out to get any, so I phoned the sewing guru, Ergonomics-bollocks Hootchie for an alternative plan, & this is what she told me.

I had to adapt her oh-so-clever plan a little bit to fit the gathered design of the dress I had in mind, but essentially it is the same.

So, after cutting and opening out each facing piece, finish the lower edge with a small zig zag stitch.  Then pin each facing piece to dress, right sides together, matching the centre point of the facing to the side seam of the dress.  Straight stitch in place along top edge.


Open out dress and iron seam flat. Then turn facing to inside & iron along seam. Secure facing to inside of dress with a few hand sewn stitches at the underarm seam.


Make a 'tube' for the ribbon at the top of the dress by turning over 0.5cm, press, then turn over another 1.5cm, press and then stitch close to the lower edge.
                                          

Finish hem of dress in the same way as by turning over 0.5cm, press.  Turn over another 1.5cm & press again.  Straight stitch. 


Use a safety pin to thread your chosen ribbon through the front and back tubes of the dress, either using one long ribbon so you end up tying over one shoulder only, or a separate ribbon for front & back.  Gather up the dress fabric.  

Try the dress on for size & secure the ribbon with a few stitches in at least one or two spots once you have worked out the length you need (to make sure they don't come out in the wash).  
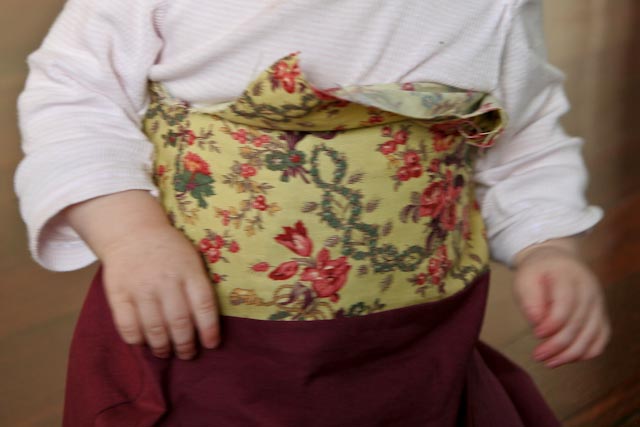
Essentially that is it if you are happy with a basic pillowcase type dress.  But I found the dress a little tent-like, so decided to add a few more touches.

I measured approx 6 inches from either front side seam, folded the fabric under 1 inch and secured these 'tucks' in place with a few stitches.


You could leave the back of the dress as is, use the same 'tuck' method as you did on the front, or make a single gather by pulling together fabric from either end and securing together:


To finish this dress I made 3 coordinating Suffolk puffs and hand stitched in place.  All done!


Monday 8 August 2011

A 'case' for action


We have been using cloth nappies with Little Imp since soon after she was born, and the elastic has now begun to go in the legs.   
That means leaking.
That means more washing.                                                                                                                                                                 One clever hootchie suggested replacing the elastic & the thrifty me thought that was a great idea….until the enthusiasm well and truly wore off and I had only re-elasticised about 6 of the 20 nappies we have. In a moment of clarity I realised I could get brand new ones off ebay for less than $5 each and sew something far more exciting with the time I’d save.  Not exactly environmentally friendly, but at the time it was justification enough for me!

I had seen some ‘pillowcase’ dresses on the internet & used the dimensions from the prudent baby blog to make my first version.  Turns out Little Imp either doesn’t fit their dimensions or has got a bit chubbier than I thought! Decided I needed to come up with my own variation of the pillowcase design.


Sunday 24 July 2011

Freestyle

Experimenting again with some freestyle stitching in this wee singlet design.  Straight stitch around Mr Tortoise & then random twirls and circles of different coloured straight stitch over and around 3 fabric dots underneath.  Realise that ribbed material like this is not the best to use, especially as I am a bit lazy & didn't use any sort of fabric support to stop the ribbing from stretching one way & then the next.  But happy enough with the outcome overall.  Just lucky to find some time in the last week to do anything with working 4 days a week, building extensions happening around us and illness plaguing each one of us in turn.


Thursday 14 July 2011

'Bowl'ed over

My dad is a pretty handy man when it comes to turning wood.  These pictures of some of his bowls speak for themselves me thinks.


p.s. my mum's pretty handy when it comes to turning clay.  I'll show you what I mean sometime soon.....